


In the world of real estate photography, a picture is worth more than a thousand words. As photographers, we are tasked with capturing the best version of a property, and one of the most powerful tools for achieving this is the Brush Tool in Photoshop. This essential tool allows you to make detailed and precise adjustments, ensuring that your photos stand out and truly represent the property in the best light possible. Whether you’re smoothing textures, correcting exposure, or adding special effects, mastering the Brush Tool is a crucial step in elevating your real estate photo editing skills.
What is the Brush Tool in Photoshop?
The Brush Tool in Photoshop is a versatile and indispensable tool that allows users to paint over their images with various effects, textures, and colors. It functions much like a traditional paintbrush but in a digital format, offering numerous settings and options to customize the brush’s behavior.
For real estate photographers, the Brush Tool is ideal for retouching images, removing blemishes, and enhancing details. It can be used to smooth out uneven lighting, correct colors, and add subtle touches that improve the overall aesthetic of a photo. This makes the Brush Tool an invaluable asset in creating professional, polished real estate images.
Basic Settings of the Brush Tool

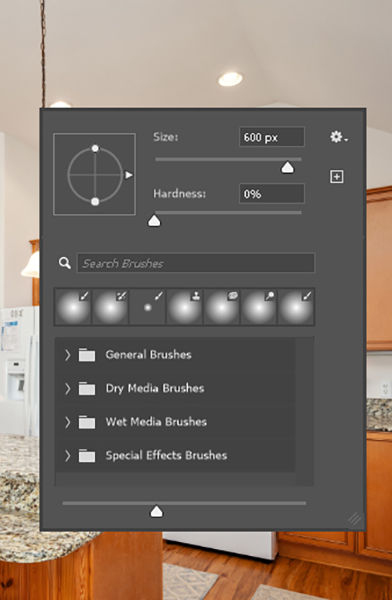
To get the most out of the Brush Tool, it’s essential to understand its basic settings. Photoshop offers a variety of brush types, each with unique characteristics. Two of the most commonly used brushes are the soft and hard brushes:
- Soft Brush: Creates a smooth, feathered edge, ideal for blending colors and creating soft transitions.
- Hard Brush: Has a sharp, defined edge, perfect for detailed work or when you need to create high-contrast effects.
The Brush Tool also offers several essential settings:
- Brush Size: Adjusting the size of your brush is crucial depending on the area you’re working on. A larger brush is perfect for covering larger areas, while a smaller brush gives you more precision.
- Hardness: This setting controls the sharpness or softness of the brush edges. A low hardness creates a softer, smoother transition, while a high hardness gives a crisper result.
- Opacity: This setting controls the transparency of the brush strokes. Lower opacity is useful for creating subtle adjustments, while higher opacity gives more visible, intense strokes.
- Flow: Flow controls the amount of color applied with each brush stroke. A lower flow means a gradual build-up of color, while a higher flow applies color more quickly and intensely.
Additionally, the Brush Tool in Photoshop includes a range of blending modes that alter how the brush interacts with the pixels on your image, such as “Normal,” “Multiply,” “Overlay,” and more.
Step-by-Step Guide to Using the Brush Tool in Photoshop
If you’re ready to start using the Brush Tool to enhance your real estate photos, follow these simple steps:
- Open Your Image: Start by opening your project in Adobe Photoshop.
- Select the Brush Tool: Find the Brush Tool in the tools panel (it looks like a paintbrush) or simply press the “B” key on your keyboard.
- Choose a Brush: In the top menu, click on the Brush Picker to select a brush type. Photoshop offers a variety of brush presets, or you can customize your own.
- Adjust Brush Settings: Using the options bar at the top, adjust the size, hardness, opacity, and flow of the brush based on your needs.
- Brush Color: To change the color, click on the Foreground Color box and select the color you want to paint with.
- Start Painting: Click and drag your mouse or tablet pen to start painting over the image. You can apply light strokes or deep brushwork depending on your settings.
- Use Layers: For better control and non-destructive editing, create a new layer for your brush strokes. This ensures that you can adjust or delete your work without affecting the original image.
Advanced Brush Settings
For more control, Photoshop also offers advanced brush settings that can make a huge difference in your editing process:
- Blend Modes: These modes determine how your brush strokes interact with the underlying image layers. “Multiply” darkens areas, while “Screen” lightens them. “Overlay” is great for enhancing contrast.
- Pencil Tool: This sub-tool behaves similarly to the Brush Tool but with a finer, harder tip, perfect for detailed line work. Unlike the Brush Tool, the Pencil Tool doesn’t have flow, making it ideal for precise detailing.
Tips for Using the Brush Tool in Real Estate Photography
To ensure your real estate photos look polished and professional, here are some tips for using the Brush Tool effectively:
- Use a Soft Brush for Subtle Adjustments: When smoothing out light transitions or enhancing shadows, a soft brush with low opacity works wonders. It helps to create a natural, soft look without harsh lines.
- Use a Hard Brush for Detailed Work: For elements like window edges, door frames, or other sharp lines, a hard brush is ideal to maintain precision.
- Fix Exposure and Lighting Issues: Use the Brush Tool to add exposure where it’s lacking or reduce light in overexposed areas. Adjusting the highlights and shadows with the Brush Tool can dramatically improve the final image.
- Enhance Colors: You can use the Brush Tool to paint over specific areas with color, improving saturation or correcting hues that may not be perfect in the original shot.
Conclusion
Mastering the Brush Tool in Photoshop is an essential skill for any real estate photographer. Whether you’re smoothing surfaces, adjusting light, or adding intricate details, this powerful tool allows you to make precise changes that can elevate your photos. By understanding its basic and advanced settings, you’ll be able to fine-tune every aspect of your image for a professional, high-quality result.
If you’re looking for professional help with editing your real estate photos, consider partnering with Alida Real Estate Photo Editing. We specialize in advanced photo retouching, color correction, and virtual staging to help make your listings shine. For more information or to get started, feel free to contact us at photonews121@gmail.com. Let us help you create stunning images that will captivate your clients.