


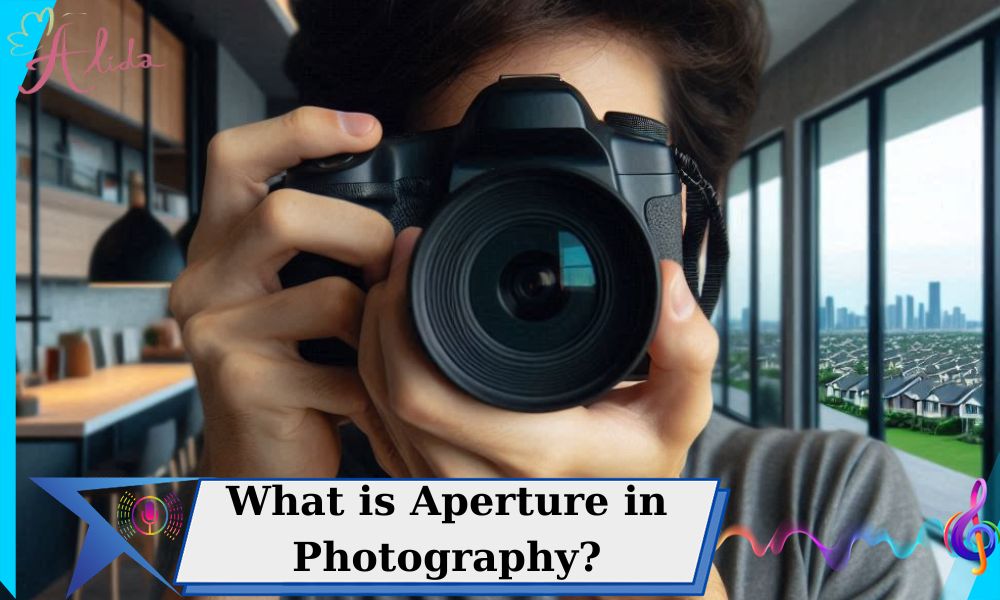
In photography, aperture refers to the opening in a camera lens that controls the amount of light that enters the camera and reaches the sensor or film. This critical component of the lens plays a major role in the exposure and depth of field in your photos. By adjusting the size of the aperture, photographers can manipulate the brightness of the image and how much of the photo is in focus.
Understanding aperture is essential for both beginners and experienced photographers because it directly impacts the overall composition and quality of your photos. The aperture setting, combined with shutter speed and ISO, determines the exposure of the image, giving the photographer full control over the final result.
How Does Aperture Work?
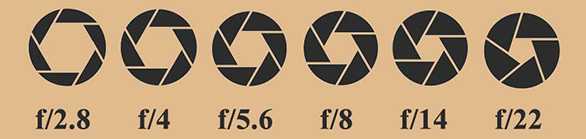
Aperture works by controlling the size of the opening in the lens, allowing light to pass through to the camera’s sensor. A larger aperture (smaller f-number) allows more light to hit the sensor, while a smaller aperture (larger f-number) allows less light. This change in aperture size is reflected in the f-stop numbers—such as f/1.4, f/2.8, f/5.6, and so on. The smaller the f-number, the larger the aperture.
The size of the aperture directly affects exposure, or the overall brightness of the image. A wider aperture (such as f/1.4) allows more light, which is particularly useful in low-light conditions. A smaller aperture (such as f/16) limits the light, resulting in darker images, which is ideal in very bright conditions or when you want a deeper field of focus.
Effects of Aperture on Images
The aperture setting impacts several aspects of an image:
- Brightness (Exposure): The wider the aperture, the more light is allowed into the camera, making the image brighter. Conversely, a narrower aperture reduces the light entering the sensor, resulting in a darker image.
- Depth of Field: This refers to how much of the image is in focus. A wide aperture (like f/1.8) creates a shallow depth of field, blurring the background and isolating the subject—a technique often used in portrait photography to create a bokeh effect. A smaller aperture (like f/8) increases the depth of field, keeping more of the image in focus, which is ideal for landscape photography.
- Sharpness and Diffraction: A very small aperture (such as f/22) can cause diffraction, which may reduce the sharpness of the image. The sharpest results are often achieved with apertures in the mid-range (f/5.6 to f/8).
- Aperture, Shutter Speed, and ISO: Aperture works in conjunction with shutter speed and ISO to determine exposure. A larger aperture (more light) allows you to use a faster shutter speed (useful for capturing motion), while a smaller aperture might require a slower shutter speed or higher ISO to compensate for the reduced light.
Choosing the Right Aperture for Different Types of Photos
Choosing the right aperture depends on the type of photography you’re doing:
- Portrait Photography: To create a beautifully blurred background and emphasize the subject, use a wide aperture like f/1.8 or f/2.8. This allows more light and isolates the subject from the background.
- Landscape Photography: For sharp focus throughout the scene, use a smaller aperture such as f/8 to f/16. This increases the depth of field, ensuring everything from the foreground to the background remains in focus.
- Low-light Conditions: When shooting in low-light environments, opt for a wider aperture (such as f/2.8) to allow more light in, preventing the image from becoming too dark. You may also need to adjust ISO and shutter speed to balance exposure.
Remember that aperture settings need to be balanced with shutter speed and ISO for optimal exposure.
Common Mistakes to Avoid When Using Aperture in Photography
Even experienced photographers sometimes make common mistakes when adjusting their aperture settings:
- Using an Aperture Too Large or Too Small: Choosing an aperture that is too wide or too narrow for the situation can result in overexposed or underexposed images.
- Overexposure and Underexposure: If the aperture is set too wide for a bright scene, or too small for a low-light situation, the photo may turn out overexposed or underexposed.
- Loss of Detail (Clipping): Using an aperture that doesn’t properly balance exposure can cause loss of detail in the highlights or shadows of the photo, known as clipping.
Tips for Mastering Aperture in Photography
To make the most of aperture in your photography, here are some useful tips:
- Experiment with Different Aperture Settings: Try various aperture settings in different lighting conditions to learn how it affects your photos. Practice will help you understand how each f-stop impacts exposure and depth of field.
- Select the Right Aperture for Your Lens: Different lenses perform best at different apertures. Lenses tend to be sharpest around f/5.6 to f/8, so experimenting with your specific lens will give you the best results.
- Use Aperture Priority Mode (A/Av): On most cameras, aperture priority mode allows you to select the aperture, and the camera will automatically adjust the shutter speed to achieve proper exposure. This is ideal for portraits and landscapes where controlling depth of field is crucial.
Conclusion on Aperture in Photography
In conclusion, understanding aperture is key to mastering the art of photography. Whether you’re capturing portraits with beautiful bokeh or landscapes with intricate details, aperture allows you to control the exposure and depth of field to achieve stunning photos. With practice, you’ll gain confidence in choosing the right aperture for any situation.
Frequently Asked Questions (FAQs)
What is the best aperture for beginners?
For beginners, a mid-range aperture like f/5.6 or f/8 is a great starting point. This will provide a good balance of sharpness and depth of field.
How does aperture affect the bokeh effect?
A larger aperture (like f/1.4 or f/2.8) creates a shallow depth of field, which produces a more pronounced bokeh effect, making the background beautifully blurred.
Does a smaller aperture always guarantee better sharpness?
Not necessarily. While smaller apertures (like f/16) increase depth of field, they can also cause diffraction, which may reduce overall sharpness. For the sharpest images, try apertures around f/5.6 to f/8.
Contact Alida for Real Estate Photo Editing Services
If you’re looking for professional real estate photo editing services, Alida can help. With years of experience, we specialize in enhancing real estate images to make properties look their best. For more information, or to get in touch, email us at photonews121@gmail.com