


In the highly competitive real estate market, first impressions are vital, and high-quality images play a key role in attracting potential buyers. Photos with distorted verticals can make a property appear unprofessional, reducing its appeal. Fixing vertical lines in real estate photos is crucial to present the property in an inviting and accurate manner. With its robust features, Photoshop offers an excellent solution to fix verticals in Photoshop and elevate the overall quality of real estate images.
This guide highlights the importance of vertical corrections, the common challenges faced by photographers, and step-by-step methods to fix verticals in Photoshop. Additionally, it provides insights into alternative tools and helpful tips for preventing such issues during photography.
Why Fixing Verticals in Real Estate Photos Is Essential
Enhances Visual Appeal
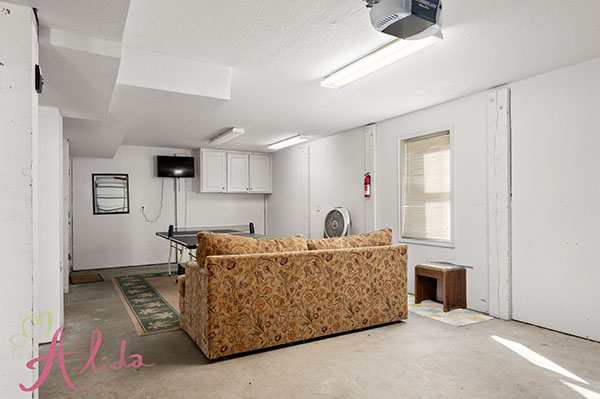
Misaligned verticals can make even the most beautiful property look unbalanced and unprofessional. Correcting these distortions ensures that the property is presented in its best light, attracting more interest from potential buyers.
Improves Marketing Performance
Professional photos are key to effective real estate marketing. By fixing vertical lines and improving image quality, you can increase engagement, generate more inquiries, and ultimately drive higher conversions.
Accurate Architectural Representation
Vertical corrections help preserve the true proportions and structure of a property. This accuracy is crucial, especially for architectural photography, as it gives viewers a realistic understanding of the space.
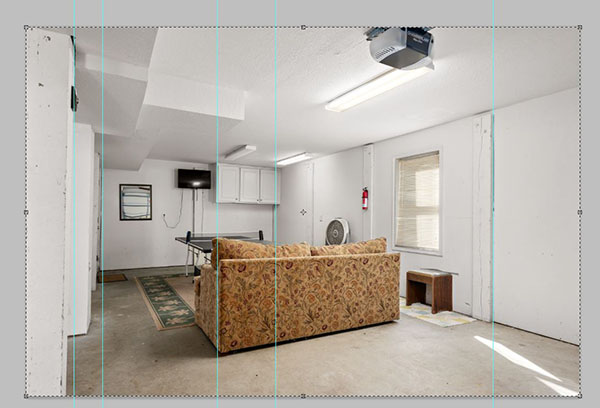
Fix Verticals in Photoshop: Common Issues
Lens Distortion
Wide-angle lenses, commonly used in real estate photography, often cause barrel distortion, where straight lines appear curved. This distortion can make vertical lines look unnatural.
Incorrect Shooting Angles
Tilting the camera upward or downward can result in converging or diverging verticals, which create an unbalanced perspective.
Editing Errors
Inexperienced photo editors may overcorrect or misalign verticals during post-production, leading to unnatural-looking images.
How to Fix Verticals in Photoshop
4.1. Using the Transform Tool (Perspective/Distort)
- Open the image in Photoshop.
- Go to the Edit menu and select Transform > Perspective or Distort.
- Use the corner handles to adjust the perspective until the vertical lines are straight.
- Zoom in to ensure precision and make fine adjustments as needed.
4.2. Using the Lens Correction Feature
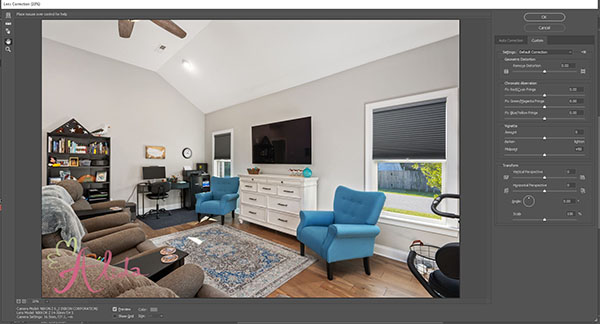
- Navigate to Filter > Lens Correction.
- In the dialog box, select the Custom tab.
- Use the “Vertical Perspective” slider to adjust the vertical alignment.
- Preview the changes and click “OK” to apply.
4.3. Using Guided Upright in Lightroom
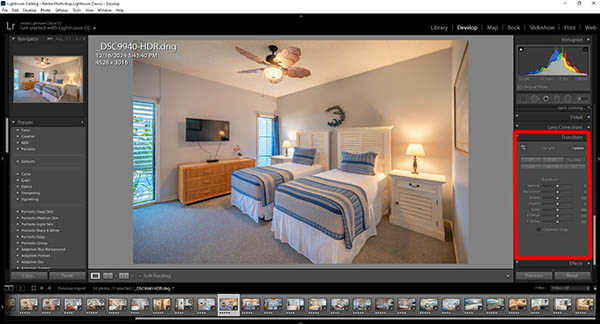
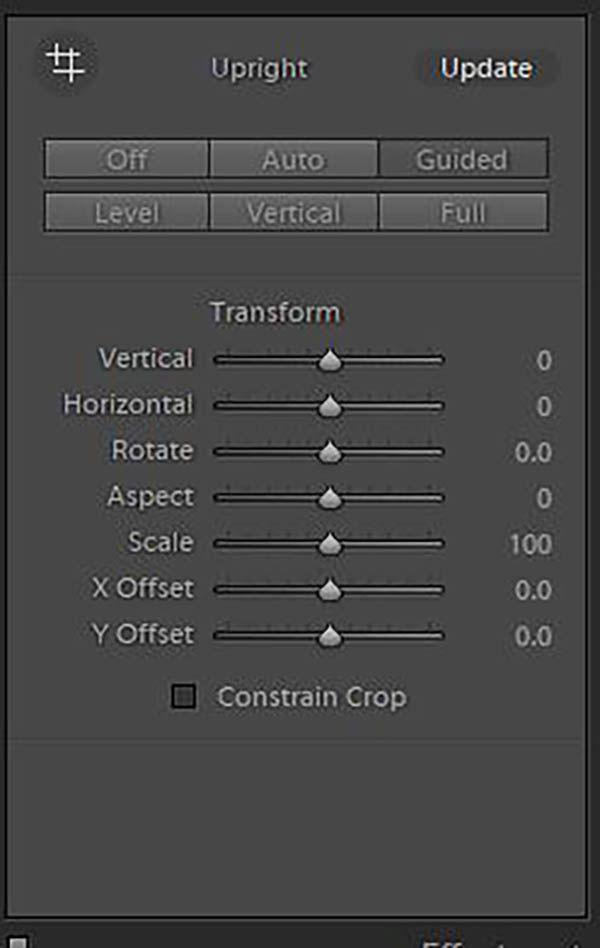
- Import the image into Lightroom and go to the Develop module.
- Locate the Transform panel and select Guided Upright.
- Draw two or more lines along the vertical edges in the photo.
- Lightroom will automatically correct the perspective. Export the image and continue editing in Photoshop if needed.
4.4. Pro Tips for Vertical Adjustments
- Enable grid lines (View > Show > Grid) in Photoshop for precise alignment.
- Always double-check the corrected image to ensure natural proportions.
- Save a backup of the original image before making any adjustments.
Alternative Tools for Vertical Correction
Free Tools
- GIMP: A free alternative to Photoshop with a similar transform tool for correcting verticals.
- Snapseed: A mobile app offering basic vertical alignment features.
Professional Software
- Lightroom: Excellent for batch processing and minor perspective corrections.
- DxO PhotoLab: Specialized in lens distortion correction and perspective adjustments.
While these tools provide useful features, Photoshop remains the most versatile and comprehensive solution for fixing verticals in real estate photos.
Fix Verticals in Photoshop: Photography Tips
- Use a Tripod: Ensure the camera is level to minimize perspective distortion.
- Maintain Distance: Step back from tall structures to reduce the angle of tilt.
- Tilt-Shift Lenses: Invest in specialized lenses designed to eliminate distortion during the shoot.
FAQs
1. Can I fix verticals without Photoshop?
Yes, you can use free tools like GIMP or mobile apps like Snapseed for basic corrections. However, Photoshop offers more precision and flexibility.
2. How long does it take to correct verticals in a photo?
With practice, it takes only a few minutes to correct verticals using Photoshop.
3. Is there a free version of Photoshop?
Photoshop offers a free trial, but it is a subscription-based tool. Free alternatives include GIMP and Snapseed.
Conclusion
Correcting verticals in real estate photos is essential to create professional, visually appealing images that accurately represent the property. Photoshop provides powerful tools for vertical corrections, ensuring precision and high-quality results. Whether you’re a seasoned photographer or just starting, mastering these techniques will enhance your real estate photography portfolio.
If you’re looking for expert real estate photo editing services, Alida is here to help. With years of experience in real estate photography, we specialize in delivering flawless images that boost your property’s marketability. Contact us today at photonews121@gmail.com to learn more about our services!