


Real estate photography plays a key role in selling properties, and the flambient technique is essential for creating balanced, professional images. By combining flash and ambient light, it highlights a property’s best features. This article covers flambient, its preparation, image capture, editing, and its impact on real estate photography editing.
1. Understanding the Flambient Technique in Real Estate Photography Editing
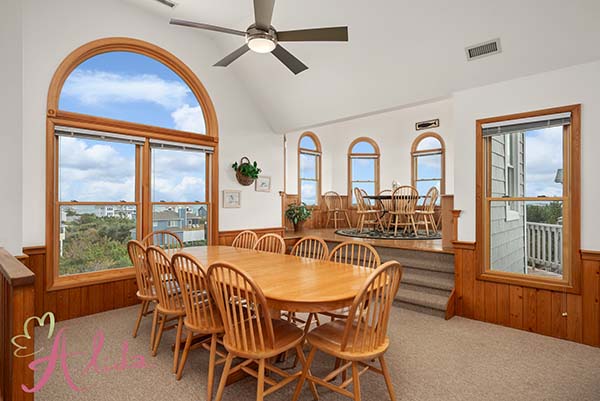
The flambient technique combines flash (artificial light) and ambient (natural light) to create well-balanced images with vibrant details and accurate colors, avoiding overexposure or underexposure. It enhances shadow details with flash while preserving natural light, offering a more natural and appealing look. This method is particularly valuable in real estate photography, capturing both interior details and overall ambiance for inviting, professional images.
2. Preparing for Flambient Photography
Before you begin shooting, ensure that you have the right equipment and setup in place to optimize the use of the flambient technique.
Essential Equipment:
- DSLR or Mirrorless Camera: Choose a camera with manual settings to control exposure and other necessary parameters.
- External Flash: A high-powered flash is crucial for filling in the dark spots and balancing the light.
- Tripod: Using a tripod will help keep the camera steady and avoid any blur from longer exposure times.
- Editing Software: Software like Adobe Photoshop or Lightroom is vital for post-processing, enabling you to merge both ambient and flash images seamlessly.
Setting Up the Scene: To get the most out of the flambient technique, the lighting setup is key. Begin by positioning the external flash carefully to prevent harsh shadows and ensure even distribution of light. Then, evaluate the ambient light in the room to make sure the natural lighting complements the artificial flash. A balance between the two will provide the best results in capturing a well-lit space that isn’t overly bright or dark.
3. Steps to Capture Flambient Images
Capturing the Ambient Shot: Start with the ambient shot, where the camera should capture the natural light coming into the room. This shot will preserve the softness and warmth of the natural environment. Adjust the exposure settings to ensure the image is not too dark or overexposed.
Capturing the Flash Shot: Next, use the external flash to fill in areas that are too shadowed. By changing the angle of the flash, you can eliminate dark spots and enhance details that the ambient light couldn’t reach, such as dark corners or furniture details.
Additional Shots (if needed): Depending on the scene and lighting, you may want to capture extra shots from different angles to ensure you have a variety of exposures to work with during post-processing. These additional shots offer more flexibility in editing, giving you the option to mix and match the best details.
4. How to Edit Flambient Photos Using Real Estate Photography Editing Techniques
Once you’ve captured your flambient images, it’s time to edit them and blend the flash and ambient shots together to create the perfect final image. Editing is essential to perfecting the flambient technique.
Importing the Images: Begin by importing both the ambient and flash images into your chosen editing software, such as Adobe Lightroom or Photoshop. You’ll want to have both images open side by side to blend the best aspects of each.
Blending the Photos: In Photoshop, use layer masks to blend the flash and ambient images together. The goal is to combine the detailed lighting from the flash shot with the soft, natural hues from the ambient image. Start by isolating the areas that need extra light and overlaying them onto the ambient photo to create a seamless, balanced image.
Refining the Image: Adjust the brightness, contrast, and saturation of each layer to fine-tune the image. Small adjustments in real estate photography editing create a big impact on achieving the desired effect.
. The ambient photo provides the lighting gradient, while the flash shot sharpens and enhances darker areas.
Fixing Imperfections: Inspect the image for any imperfections, such as unnatural color casts, overexposed highlights, or shadows that appear too harsh. Use Photoshop’s healing brush or clone stamp tool to correct any unwanted blemishes and finalize the image.
5. Tips and Tricks for Perfecting Flambient Photography
- Proper Flash Placement: Be strategic about where you position your flash to avoid creating hard shadows. A carefully placed flash will produce a softer, more flattering light.
- Subtle Blending: When blending, make sure the flash doesn’t overpower the ambient light. The key is to keep the natural ambiance intact while enhancing the image with added light where necessary.
- Layer Refinement: Take time to adjust each layer individually. By tweaking brightness, contrast, and saturation for each layer, you’ll create a more realistic and polished look.
6. Conclusion
The flambient technique helps real estate photographers create professional, well-balanced images with accurate colors and details, giving listings an edge. Alida Team specializes in real estate photo editing, including advanced flambient techniques, to enhance your photos and attract potential buyers. Contact us at photonews121@gmail.com to learn more.