


The Flambient technique merges “flash” and “ambient” lighting to achieve high-quality, balanced images in real estate photography. Unlike standard approaches, Flambient integrates natural light with carefully positioned flash, enhancing detail, color accuracy, and depth. This real estate photography tutorial explores the benefits, step-by-step process, and essential tips for using the Flambient method—a valuable skill in today’s competitive real estate market.
Real Estate Photography Tutorial: Why Choose Flambient Technique Over Others?
Flambient stands out compared to traditional techniques like HDR (High Dynamic Range) or natural light photography. HDR typically involves combining multiple exposures of the same scene to handle varying light levels, but it can sometimes lead to overly processed results. Natural light photography, on the other hand, often lacks the contrast and detail needed for vibrant property shots.
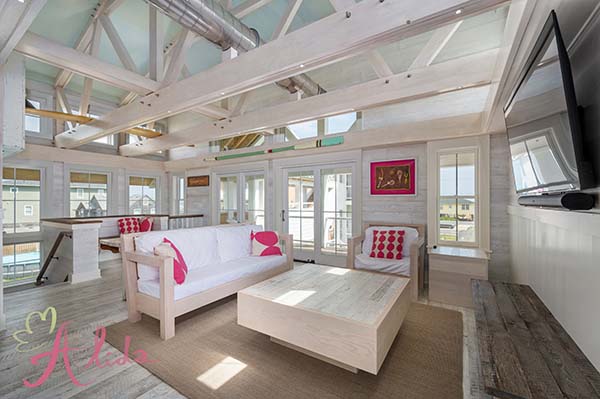
Flambient strikes a balance by harnessing natural light for realism, while adding flash to highlight details and reduce shadows, resulting in crisp and true-to-life images. For instance, a living room shot with both natural light and flash can showcase textures, furniture details, and window views in one harmonious composition.
Real Estate Photography Tutorial: How to Prepare for a Flambient Shoot
Preparation is essential for successful Flambient photography. Here’s what you’ll need:
- Equipment: A DSLR or mirrorless camera, a wide-angle lens for capturing room dimensions, and an external flash.
- Camera Settings: Set a low ISO to minimize noise, adjust the aperture for the desired depth of field, and select a suitable shutter speed.
- Lighting Checks: Assess the natural lighting in the room, noting the areas with shadows or highlights. Position the flash strategically to complement ambient light and avoid harsh spots.
Ensuring the property is properly staged, decluttered, and cleaned will further enhance the final image quality.
Step-by-Step Guide to Shooting with the Flambient Technique
Once prepared, follow these steps to execute the Flambient technique effectively:
- Step 1: Capture the Ambient Light Shot
Start by taking a photo using only natural light. This shot captures the overall feel and mood of the room, especially the softer, shadowed areas. Adjust exposure to prevent bright areas like windows from appearing overexposed. - Step 2: Add a Flash Shot
Next, use your flash to brighten specific areas or to reduce harsh shadows. Aim the flash toward walls or ceilings rather than directly at objects to create a diffused effect that complements the ambient light. - Step 3: Combine the Images
With both the ambient and flash images in hand, use editing software to layer and blend them. This combination highlights details while preserving the room’s natural feel.
When blending, pay attention to color temperature differences between the natural light and flash to ensure a unified look. Adjusting white balance and exposure during the blending process will help achieve a seamless final image.
Post-Processing and Image Blending with the Flambient Technique
Post-processing is crucial for Flambient images. Here are some steps to enhance your photos:
- Image Selection and Layering: In software like Adobe Photoshop, open both the ambient and flash images. Layer them, setting the flash shot layer to “Lighten” mode, or use layer masks to bring out the best of each image.
- Adjustments for Balance: Fine-tune exposure, contrast, and white balance to match the lighting and colors in both images.
- Color Correction Tools: Use color grading to enhance natural tones, ensuring that walls, furniture, and outdoor views look consistent and appealing.
This blending method produces photos that feel natural while displaying all property details in perfect harmony.
Tips to Improve Your Flambient Photography Quality
To achieve the best results with Flambient, consider the following tips:
- Control Shadows and Highlights: Adjust flash positioning to minimize harsh shadows and ensure even lighting.
- Use Diffusion Tools: Softboxes or bounce cards can soften the flash, reducing glare and achieving a natural blend.
- Avoid Common Mistakes: Avoid overly bright flash or shadows near walls; instead, aim for balanced, subtle lighting that accentuates the property without overpowering it.
With these techniques, you can improve the overall quality of your images, making properties more inviting and attractive to potential buyers.
Conclusion: Why Flambient Is a Top Choice for Real Estate Photography
Flambient photography is an ideal choice for real estate professionals looking to capture properties in their best light. Its combination of natural and flash lighting provides a balanced and professional look that’s essential in today’s competitive real estate market. Investing time in learning this technique can elevate your photography portfolio and impress clients with high-quality images that highlight property details beautifully.
If you’re seeking a reliable partner to perfect your real estate images, Alida Team offers specialized photo editing services tailored for real estate photography. Our expertise includes HDR blending, color correction, and day-to-night conversions to make your images stand out. For more information or to discuss your editing needs, reach out to us at photonews121@gmail.com.